×
- Live Chat
- 1-888-788-8214


My Garage
My Account
Cart
Genuine Hyundai Elantra Timing Belt
Engine Timing Belt- Select Vehicle by Model
- Select Vehicle by VIN
Select Vehicle by Model
orMake
Model
Year
Select Vehicle by VIN
For the most accurate results, select vehicle by your VIN (Vehicle Identification Number).
16 Timing Belts found
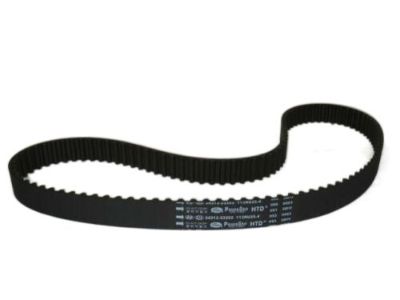
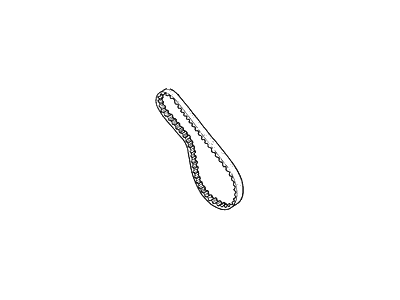
Hyundai Elantra Valve Timing Belt
Part Number: 24312-23202$71.67 MSRP: $100.69You Save: $29.02 (29%)Ships in 1-3 Business DaysHyundai Elantra Valve Timing Belt
Part Number: 24312-23201$56.49 MSRP: $76.56You Save: $20.07 (27%)Ships in 1-3 Business DaysHyundai Elantra Valve Timing Belt
Part Number: 24312-33160$88.12 MSRP: $123.81You Save: $35.69 (29%)Ships in 1-3 Business DaysHyundai Elantra Valve Timing Belt
Part Number: 24312-23001$73.36 MSRP: $100.69You Save: $27.33 (28%)Ships in 1-3 Business DaysHyundai Elantra Valve Timing Belt
Part Number: 24312-33130$90.19 MSRP: $123.81You Save: $33.62 (28%)Ships in 1-3 Business DaysHyundai Elantra Valve Timing Belt
Part Number: 24312-33140$90.19 MSRP: $123.81You Save: $33.62 (28%)Ships in 1-3 Business DaysHyundai Elantra Valve Timing Belt
Part Number: 24312-33150$90.19 MSRP: $123.81You Save: $33.62 (28%)Ships in 1-3 Business DaysHyundai Elantra Valve Timing Belt
Part Number: 24312-33010$91.06 MSRP: $125.00You Save: $33.94 (28%)Ships in 1-3 Business DaysHyundai Elantra Valve Timing Belt
Part Number: 24312-33020$91.06 MSRP: $125.00You Save: $33.94 (28%)Ships in 1-3 Business DaysHyundai Elantra Valve Timing Belt
Part Number: 24312-33030$91.06 MSRP: $125.00You Save: $33.94 (28%)Ships in 1-3 Business DaysHyundai Elantra Valve Timing Belt
Part Number: 24312-33050$91.06 MSRP: $125.00You Save: $33.94 (28%)Ships in 1-3 Business DaysHyundai Elantra Valve Timing Belt
Part Number: 24312-33060$88.97 MSRP: $125.00You Save: $36.03 (29%)Ships in 1-3 Business DaysHyundai Elantra Balance Timing Belt
Part Number: 23356-33130$21.09 MSRP: $27.26You Save: $6.17 (23%)Ships in 1-3 Business DaysHyundai Elantra Balance Timing Belt
Part Number: 23356-33140$21.09 MSRP: $27.26You Save: $6.17 (23%)Ships in 1-3 Business DaysHyundai Elantra Balance Timing Belt
Part Number: 23356-33160$21.09 MSRP: $27.26You Save: $6.17 (23%)Ships in 1-3 Business Days
Hyundai Elantra Timing Belt
If you are looking for affordable high-quality OEM Hyundai Elantra Timing Belt, then you have come to the prime place. Our website provides a large amount of genuine Hyundai Elantra Timing Belt at unbeatable prices. All our parts come backed with the manufacturer's warranty.
Hyundai Elantra Timing Belt Parts Questions & Experts Answers
- Q: How to remove and install the Timing Belt and Sprocket on 1998 and earier Hyundai Elantra?A: Before you attempt to replace it; switch off the vehicle's engine and unscrew the nut on the negative terminal of the battery and; ensure that the front part of the car is rightly lifted and supported by jackstands and the right-front wheel of the vehicle is loosened and then taken-off. Turn the engine clockwise until the pointer is aligned with the No.1 cylinder and reaches Top Dead Centre. Support the engine for 2007 and later models using the floor jack and a piece of wood on the frame cross member, and then, unbolt the right side Engine Mount. First of all, eliminate the accessory drivebelts, then, unscrew the bolts of the water pump pulley and drop the water pump pulley. Insert a chain or strap wrench to grasp the crankshaft pulley for rotating the pulley as additional keys/rear crank pulley bolts are removed and while removing the crank pulley such that No. 1 cylinder remains at TDC. : Next to this, one should separate the crankshaft pulley while also taking out the timing belt retainer/guide flange and then the bolts of the upper and lower timing belt covers. Ensure that the camshaft sprocket is aligned properly at TDC in the compression stroke so that a hole in the spoke of the sprocket is in-line with a markup on the cylinder head. In case timing belt is to be re-used, it should have some sort of directional arrow to signify the correct rotation. Loosen and take off the timing belt tensioner pulley and bolt and the timing belt itself. Take out the timing belt idler pulley bolt and the idler pulley. If the camshaft sprocket has to be removed then apply a wrench to hold the camshaft in position, and then unscrew the sprocket retaining bolt and finally detach the sprocket. Pull off the crankshaft timing belt sprocket. Look at the performance of the idler pulley and the timing belt tensioner, look for wear on the belt in addition to checking for signs of oil on the timing belt. Replace any worn parts and after reviewing that the belt should be replaced if more than 80,000 miles have been made in the car or if it looks worn. After installation make sure that No. 1 piston is once again at TDC and that the timing sprockets have matched. Place the timing belt around the crankshaft sprocket go under it and if you are reusing the old belt make sure that the arrow on the belt is facing the right way. Ensure that the belt teeth engage the crankshaft sprocket, place the belt over the idler pulley and camshaft sprocket while making sure that it lies properly in place. Tighten the timing belt to the correct tension; ensure that the front run of the belt is pulling tight with no slack while the rear run of the belt is the slack one. When making sure of the alignment of the marks on both the crankshaft and the camshaft, rotate the crankshaft a further two revolutions before setting it back in relevant position to TDC in relation to the camshaft sprocket mark. Place the upper and lower timing belt covers before the timing belt cover bolts are tightened in the proper manner, put the crankshaft pulley with the help of a wrench and tighten the crankshaft pulley bolt. Replace the water pump pulley and Fasten the bolts properly then fix the electrical accessory drive belt and finality reconnect the negative terminal of the battery.
Related Hyundai Elantra Parts
Browse by Year
2010 Timing Belt 2009 Timing Belt 2008 Timing Belt 2007 Timing Belt 2006 Timing Belt 2005 Timing Belt 2004 Timing Belt 2003 Timing Belt 2002 Timing Belt 2001 Timing Belt 2000 Timing Belt 1999 Timing Belt 1998 Timing Belt 1997 Timing Belt 1996 Timing Belt 1995 Timing Belt 1994 Timing Belt 1993 Timing Belt 1992 Timing Belt 1991 Timing Belt
